
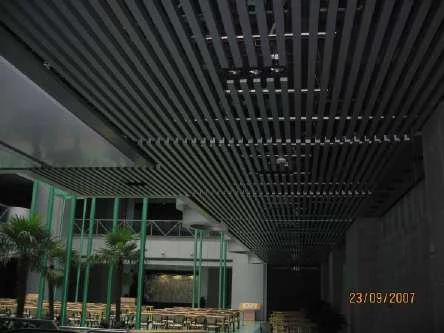
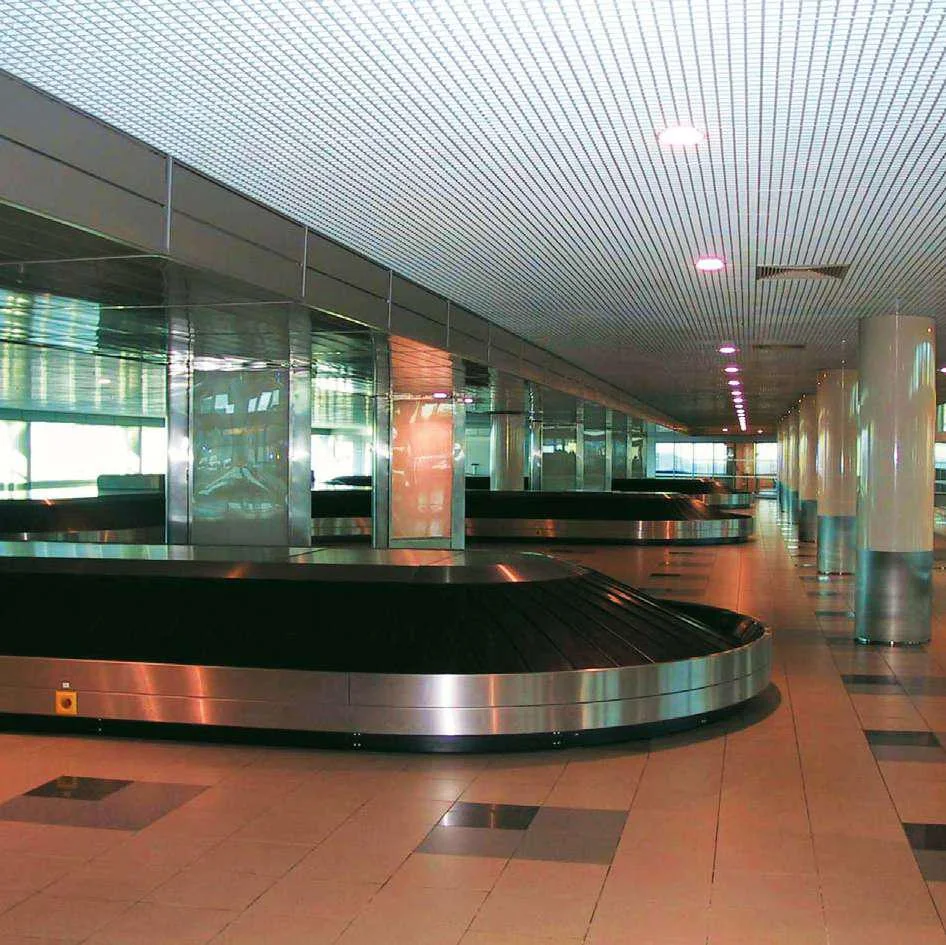
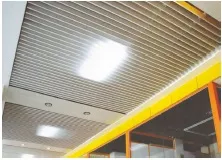
The Baffle U strip ceiling is a liner type ceiling, in which we used a U strip panel on the alternative space and hang those in the ceiling with the help of a U strip carrier.
Baffle U strip ceiling concept:
Sometimes project requirement is the only lavish, beautiful look along with some acoustic properties. On those place ceiling presentation as royal, exclusive, beautiful get most important. So, keep those requirements in the mind, a new type of ceiling get developed as a name of Baffle U strip ceiling.
Advantages:
1. Easy to install.
2. Lightweight
3. Beautiful Look.
4. Various possibilities to create more design.
5. Good acoustic properties.
6. Easy to uninstall and reinstall in case of any repair in the plenum.
Acoustic Properties:
In the baffled ceiling, panels installed at an alternative space in the perpendicular direction, those panels just distract sound waves and create a sufficient acoustic environment from the ceiling side.
If you need more acoustic properties you may go with perforated panels. For acoustic properties basically use punching in the panels which are called perforation. The standard diameter of the punching hole is 1.8mm and 2.5mm. Those days many types of punching available like square, rectangular, and people with the help of punching creating different designs also on panels. After perforation to improve more acoustic property, paste non-woven acoustic fleece inside the panels. These perforated panels absorb and district both do with sound waves and create acoustic environments.
Insulation Properties:
Due to the absence of a plenum between the main and false ceiling in the baffle false ceiling, it not provide and insulation from the ceiling side.
If you need insulation, then you can use glass wool or rock wool inside panels, but it will be a costly one.
Design:
The baffle ceiling has many possibilities to create a new design:
1. Heights of Panels:
To create the design, we can choose different height panels for a single place, Ex. in the area of 1 sqm, we decide the width of panel 50 and center to center gap in panel 150mm. Then we can choose panel as
200mm,175mm,150mm,125mm,100mm,75mm, 50mm. we can install those a straight or alternative pattern.

2. Different Color Pattern:
you may make pattern on the basises of different color combination.
3.Create Figuer:
you may create different figure like ovel, square, trangle with the help of baffle panels.
4.Wooden finsed Coating:

Best Places to Install:
Baffle Ceiling Ideal for showrooms, departmental store, shopes, restaurant, cafeteria, offices, conference room and place where business foot fall is high.


The standard rule to select gap between two baffle is, just keep gap between two baffle equal to the height of baffle, reason behind of that, when a person enter in a room and see just ceiling side,his eyes just look at 45 degree of angle.On this angle if baffele height and gap get equal then main ceiling visiablty just hidden for him.
But some people suggest to get equal with baffle exposed width.
Our suggestion is just go with first rule.

Sizes:
The standard size of baffle height 100mm, width 50mm and center to center gap is 150mm. but we may go with other specification also according project requirement. The lenght of baffle you can have 6000mm in white coil coated color, but if you go with some other color or wooden finish maximum lenght possibly is 1000mm.
Material Required:
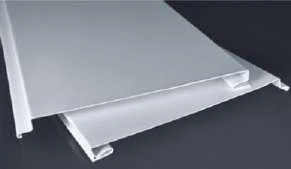
1,Baffle Panels
2.Panel Jointer (not required in on alternate method)
3.Threaded Wire
4.Baffle Top(1) & Bottom(1)Bracket
5.Edge Profile (not required in on alternate method)
6.Threaded Wire Nut(2)+Versel(2)
7.Baffle Bolt(1) +Nut(2)+Versel(2)
8.Baffle End Cap (not required in wall to wall method)
9.Baffle Carrier
10.Carrier Jointer
Hardware Required:
1.Fastner
2.Screw/Nail
3.Geti
Installation:
The standard baffle ceiling may install in two way:-
1. Wall to Wall:- In this we start baffle from one wall and end it on opposite wall, if baffle lenght get short then use jointer and increase the length.
2. On Altenative Lenght:- In this we start baffle a specific gap from wall like 50mm or 100mm, after use full available lenght of baffle leave same gap as start I did, then install 2nd baffle. this process we do till the reach of opposite wall.
Our suggestion use on alternative lenght method, in this baffles feels totally in air, looks very beautiful. Thats method also solve the baffle lenght problem, because when we use jointer there looks the hairgap.


